The bread mould experiment is a common practical activity in grade 11 CAPS (Curriculum Assessment Policy Statement) Science in South Africa. The aim of this experiment is to demonstrate the process of fungal growth on food.
Bread Mould Experiment for Grade 11 Process
Materials:
- Two slices of bread
- A zip-lock plastic bag
- Water spray bottle
- Paper towel
Procedure:
- Wash your hands thoroughly before starting the experiment.
- Take two slices of bread and place them into the zip-lock plastic bag.
- Close the bag, but make sure it is not airtight, as air is needed for the experiment.
- Label one slice of bread as “control” and the other as “experimental.”
- Spray a small amount of water onto the experimental slice of bread.
- Use a paper towel to remove any excess moisture from the bag.
- Place the bag in a warm, dark place, such as a cupboard or drawer.
- Observe the slices of bread after 24 hours, 48 hours, and 72 hours. Record your observations in a table.
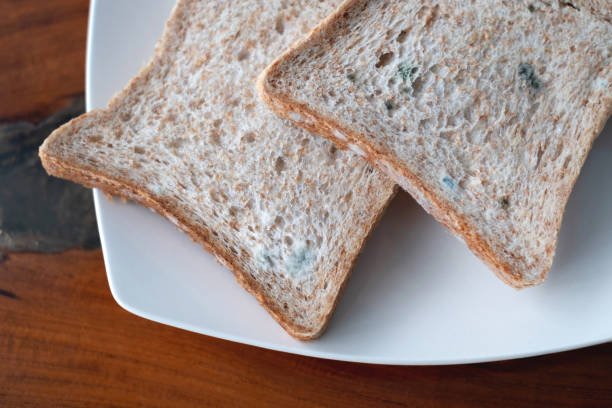
Observations:
After 24 hours, both slices of bread should look similar. However, after 48 hours, the experimental slice of bread should start to show signs of fungal growth, while the control slice remains relatively unchanged. By 72 hours, the experimental slice should be fully covered in mould, while the control slice should remain relatively unchanged.
Conclusion:
The bread mould experiment demonstrates the process of fungal growth on food. It highlights the importance of proper food storage and hygiene practices to prevent the growth of harmful fungi on food. This experiment also provides an opportunity for learners to develop skills in scientific observation, data collection, and analysis.
Downloadable Bread Mould Experiment for Grade 11
Get Free Help for Your Assignment Today
Click the Button Below: